[centos 6.4 server]
系统安装请参考:1.防火墙设置:iptables -Fservice iptables saveservice iptables restartvim /etc/sysconfig/iptables#######################.....:OUTPUT ACCEPT [4:512]-A INPUT -m state --state ESTABLISHED,RELATED -j ACCEPT-A INPUT -p icmp -j ACCEPT-A INPUT -i lo -j ACCEPT-A INPUT -m state --state NEW -m tcp -p tcp --dport 22 -j ACCEPT-A INPUT -m state --state NEW -m tcp -p tcp --dport 80 -j ACCEPT-A INPUT -m state --state NEW -m tcp -p tcp --dport 3306 -j ACCEPT-A INPUT -j REJECT --reject-with icmp-host-prohibited-A FORWARD -j REJECT --reject-with icmp-host-prohibitedCOMMIT...#########################service iptables restart
2.关闭SELINUX 并设置指定IP
vim /etc/selinux/config######SELINUX=enforcing#SELINUXTYPE=targetedSELINUX=disabled#####vim /etc/sysconfig/network-scripts/ifcfg-eth0###########DEVICE=eth0HWADDR=00:0C:29:55:98:1ETYPE=EthernetONBOOT=yesBOOTPROTO=noneNETMASK=255.255.0.0IPADDR=172.26.11.100GATEWAY=172.26.0.1###########vim /etc/resolv.conf###########search localdomainnameserver 8.8.8.8nameserver 202.96.128.68 nameserver 202.106.0.20 ###########service network restart
3.更新yum源
yum check-update#删除系统自带的apache/php 等·····(有可能系统有自动装上这些了…)yum remove httpd* php*
4.安装nginx
由于centos没有默认的nginx软件包,需要启用REHL的附件包rpm -ivh http://nginx.org/packages/centos/6/noarch/RPMS/nginx-release-centos-6-0.el6.ngx.noarch.rpmyum -y install nginx#设置nginx开机启动chkconfig nginx on#启动nginxservice nginx start
ok,直接访问:http://172.26.11.100/ 即可看nginx是否正常运行了。
5.安装MySQL
yum -y install mysql-server/etc/init.d/mysqld start#设为开机启动chkconfig mysqld on#配置文件cp /usr/share/mysql/my-medium.cnf /etc/my.cnf#为root账户设置密码 回车,根据提示输入Y,输入2次密码,回车,根据提示一路输入Y,最后出现:Thanks for using MySQL!mysql_secure_installation#MySql密码设置完成,重新启动 MySQL/etc/init.d/mysqld stop/etc/init.d/mysqld start
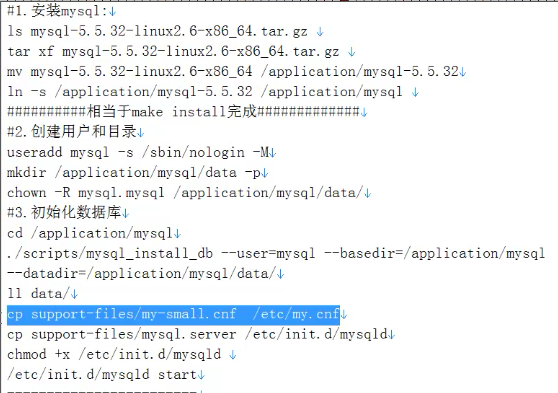
二进制安装mysql

6.安装php5
yum install zlib libxml libjpeg freetype libpng gd curl libiconv zlib-devel libxml2-devel libjpeg-devel freetype-devel libpng-devel gd-devel curl-devel -y #检查安装包 rpm -qa ...... 安装 libiconv libmcrypt mhash mcrypt yum -y install php php-fpm php-mysql php-gd libjpeg* php-imap php-ldap php-odbc php-pear php-xml php-xmlrpc php-mbstring php-mcrypt php-bcmath php-mhash libmcrypt #设置php-fpm开机启动chkconfig php-fpm on#启动php-fpm/etc/init.d/php-fpm start
yum安装php5.6
rpm -Uvh http://ftp.iij.ad.jp/pub/linux/fedora/epel/6/i386/epel-release-6-8.noarch.rpm;rpm -Uvh http://rpms.famillecollet.com/enterprise/remi-release-6.rpm;yum list --enablerepo=remi --enablerepo=remi-php56 | grep php;yum install --enablerepo=remi --enablerepo=remi-php56 php php-mysql php-opcache php-pecl-apcu php-devel php-mbstring php-mcrypt php-mysqlnd php-phpunit-PHPUnit php-pecl-xdebug php-pecl-xhprof php-pdo php-pear php-fpm php-cli php-xml php-bcmath php-process php-gd php-common;php -v;
7.配置nginx支持php
cp /etc/nginx/conf.d/default.conf /etc/nginx/conf.d/default.confbak #备份原有配置文件vim /etc/nginx/conf.d/default.conf######################....index index.php index.html index.htm;# pass the PHP scripts to FastCGI server listening on 127.0.0.1:9000#location ~ \.php$ { #root html;#注意这一行请注释掉!!! fastcgi_pass 127.0.0.1:9000; fastcgi_index index.php; fastcgi_param SCRIPT_FILENAME $document_root$fastcgi_script_name; include fastcgi_params;}######################
这里可以用netstat -ntpl 查看php-fpm的监听端口127.0.0.1:9000是不是真的存在
注意fastcgi_param行的参数,改为$document_root$fastcgi_script_name,或者使用绝对路径location ~ \.php$ { 里面的 root html;请注释掉,不然就覆盖外面的root了!!!!#重启nginxservice nginx restart#配置php.inivim /etc/php.ini ##下面的设置内容仅供参考!!!#########################...date.timezone = PRC #设置正确的时区disable_functions =passthru,exec,system,chroot,scandir,chgrp,chown,shell_exec,proc_open,proc_get_status,ini_alter,ini_alter,ini_restore,dl,openlog,syslog,readlink,symlink,popepassthru,stream_socket_server,escapeshellcmd,dll,popen,disk_free_space,checkdnsrr,checkdnsrr,getservbyname,getservbyport,disk_total_space,posix_ctermid,posix_get_last_error,posix_getcwd,posix_getegid,posix_geteuid,posix_getgid,posix_getgrgid,posix_getgrnam,posix_getgroups,posix_getlogin,posix_getpgid,posix_getpgrp,posix_getpid,posix_getppid,posix_getpwnam,posix_getpwuid, posix_getrlimit, posix_getsid,posix_getuid,posix_isatty,posix_kill,posix_mkfifo,posix_setegid,posix_seteuid,posix_setgid,posix_setpgid,posix_setsid,posix_setuid,posix_strerror,posix_times,posix_ttyname,posix_uname#禁用某些危险函数!expose_php = Off #禁止显示php版本的信息magic_quotes_gpc = On #打开magic_quotes_gpc来防止SQL注入 这个还是关闭吧。。。。不同的版本有点问题short_open_tag = ON #支持php短标签open_basedir = .:/tmp/ #设置允许访问当前目录(即PHP脚本文件所在之目录)和/tmp/目录,可以防止php木马跨站,如果改了之后安装程序有问题(例如:织梦内容管理系统),可以注销此行,或者直接写上程序的目录/data/web/test/:/tmp/#############################配置php-fpmcp /etc/php-fpm.d/www.conf /etc/php-fpm.d/www.confbakvim /etc/php-fpm.d/www.conf#################################user = nginxgroup = nginx#################################cat /etc/passwd 可以查看有没有nginx的用户组和用户重启nginx和php/etc/init.d/nginx restart/etc/init.d/php-fpm restart写个phpinfo访问结果如下:

方法二 快速安装nginx +php +mysql
[root@greymouster ~]# vi /etc/yum.repos.d/nginx.repo[nginx]name=nginx repobaseurl=http://nginx.org/packages/centos/6/$basearch/gpgcheck=0enabled=1[root@greymouster ~]# yum list nginx[root@greymouster ~]# yum install nginx [root@greymouster ~]# /etc/init.d/nginx start [root@greymouster ~]# yum install php php-fpm
[root@greymouster ~]# /etc/init.d/php-fpm start
[root@greymouster ~]# vi /etc/nginx/conf.d/default.conf
location ~ \.php$ {
root /usr/share/nginx/html; fastcgi_pass 127.0.0.1:9000; fastcgi_index index.php; fastcgi_param SCRIPT_FILENAME $document_root$fastcgi_script_name; include fastcgi_params; }[root@greymouster ~]# /etc/init.d/nginx restart
[root@greymouster ~]# cat >>/usr/share/nginx/html/info.php<<EOF
> <?php
> phpinfo(); > EOF[root@greymouster ~]# yum install mysql mysql-server
[root@greymouster ~]# mysql_install_db
[root@greymouster ~]# mysqld_safe &
[root@greymouster ~]# mysql -uroot
[root@greymouster ~]# yum install php-mysql
[root@greymouster ~]# /etc/init.d/php-fpm restart
如果忘记mysql密码
第一步,先停掉msyql服务,当然我没有停止服务后面也是可以的。
第二步,修改Mysql的登录配置,在ect/my.cnf里
添加skip-grant-tables 用来跳过权限检查,这里要注意,一定要写在[mysqld]的下面
datadir = /usr/local/mysql/data
socket=/var/lib/mysql/mysql.sock我就是因为写到下面的[mysqld_safe]里去了,导致第一次修改没有生效
修改完后就是这个样子:
第三步,重启Mysql服务